Introduction
When working on digital design projects, whether in Photoshop, Illustrator, or other design software, layers are essential for maintaining control and flexibility over your work. However, as projects become more complex, managing multiple layers can get overwhelming. This is where layer groups come into play. Organizing layers effectively can improve workflow efficiency, reduce errors, and make edits easier.
1. Understanding Layers in Digital Design
What Are Layers?
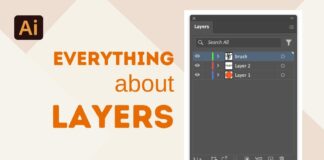
Layers are like transparent sheets stacked on top of each other. Each element of a design can exist on a separate layer, allowing for independent editing and adjustments without affecting other parts of the project.
Why Are Layers Important?
- Allow non-destructive editing
- Provide better control over elements
- Facilitate easier revisions
- Enable advanced effects and adjustments
Common Layer Types
- Raster Layers – Pixel-based layers used for painting and photo editing.
- Vector Layers – Scalable layers used for sharp and editable designs.
- Adjustment Layers – Used for color correction and effects.
- Text Layers – Contain editable text elements.
2. What Are Layer Groups?
A layer group is a collection of layers grouped together under a single folder. This helps in organizing complex projects by categorizing related elements.
Benefits of Layer Groups
✔ Reduces clutter in the layers panel
✔ Allows bulk movements and transformations
✔ Enables quick toggling of visibility
✔ Helps in applying effects or masks to multiple layers at once
3. How to Create and Use Layer Groups
Step-by-Step Guide
- Select Layers to Group – Hold Shift (for consecutive selection) or Ctrl/Cmd (for individual selection).
- Create a Group – Press Ctrl + G (Cmd + G on Mac) or use the “New Group” option in the Layers panel.
- Rename the Group – Double-click the group name for better identification.
- Drag and Drop Layers – Move layers into the group if they weren’t selected initially.
Pro Tips for Effective Layer Grouping
✔ Keep related elements together (e.g., all text layers in one group).
✔ Name groups logically (e.g., “Header,” “Background,” “Icons”).
✔ Use color coding to differentiate groups.
✔ Nest groups for even better organization.
4. Managing Layer Visibility and Locking Layers
Toggling Visibility
Click the eye icon next to a layer or group to hide or show it. This helps focus on specific parts of the design.
Locking Layers for Protection
Use the lock options in the Layers panel to prevent accidental edits:
- Lock Transparent Pixels – Prevents painting outside existing pixels.
- Lock Image Pixels – Stops direct edits to the layer.
- Lock Position – Prevents movement.
- Fully Lock – Disables all edits.
5. Applying Masks and Effects to Layer Groups
Layer groups can have masks and effects applied to them just like individual layers. This is useful for making non-destructive adjustments to multiple layers at once.
Applying a Layer Mask to a Group
- Select the group.
- Click the Add Layer Mask button at the bottom of the Layers panel.
- Use a brush to paint black (hide) or white (reveal) areas in the mask.
Adding Effects to Groups
- Select the group.
- Click on FX (Layer Styles) at the bottom of the Layers panel.
- Choose effects like drop shadow, outer glow, or stroke to apply them to all layers within the group.
6. Smart Objects: The Next Level of Layer Organization
For an even better workflow, convert groups into Smart Objects.
✔ Helps maintain quality when resizing
✔ Allows for non-destructive editing
✔ Keeps the Layers panel clean
To convert a group into a Smart Object:
- Right-click the group and select Convert to Smart Object.
- Double-click the Smart Object to edit its contents.
7. Best Practices for Organizing Layers and Layer Groups
- Use clear, descriptive names for each layer and group.
- Utilize layer colors to distinguish between different sections.
- Keep adjustment layers at the top for global edits.
- Regularly clean up unused layers to maintain efficiency.
8. Conclusion
Using layers and layer groups effectively can drastically improve your workflow, making complex projects more manageable. Whether you’re a beginner or a professional designer, organizing layers properly ensures better efficiency, easier revisions, and a cleaner project structure.
By implementing the best practices outlined above, you’ll be able to work faster and more efficiently on any digital design project.
FAQs
1. How do I rename a layer or layer group?
Double-click on the layer or group name in the Layers panel and type in a new name.
2. Can I move multiple layers at once?
Yes! Select multiple layers by holding Shift (for a range) or Ctrl/Cmd (for specific layers) and then move them together.
3. What’s the difference between a layer mask and a clipping mask?
A layer mask controls the visibility of parts of a layer using black and white. A clipping mask confines the visibility of one layer to the shape of the layer below it.
4. How can I quickly duplicate a layer?
Press Ctrl + J (Cmd + J on Mac) to duplicate a selected layer.
5. Can I apply the same effect to multiple layers at once?
Yes! Either group the layers and apply the effect to the group or right-click an effect and choose “Copy Layer Style” to paste it onto other layers.