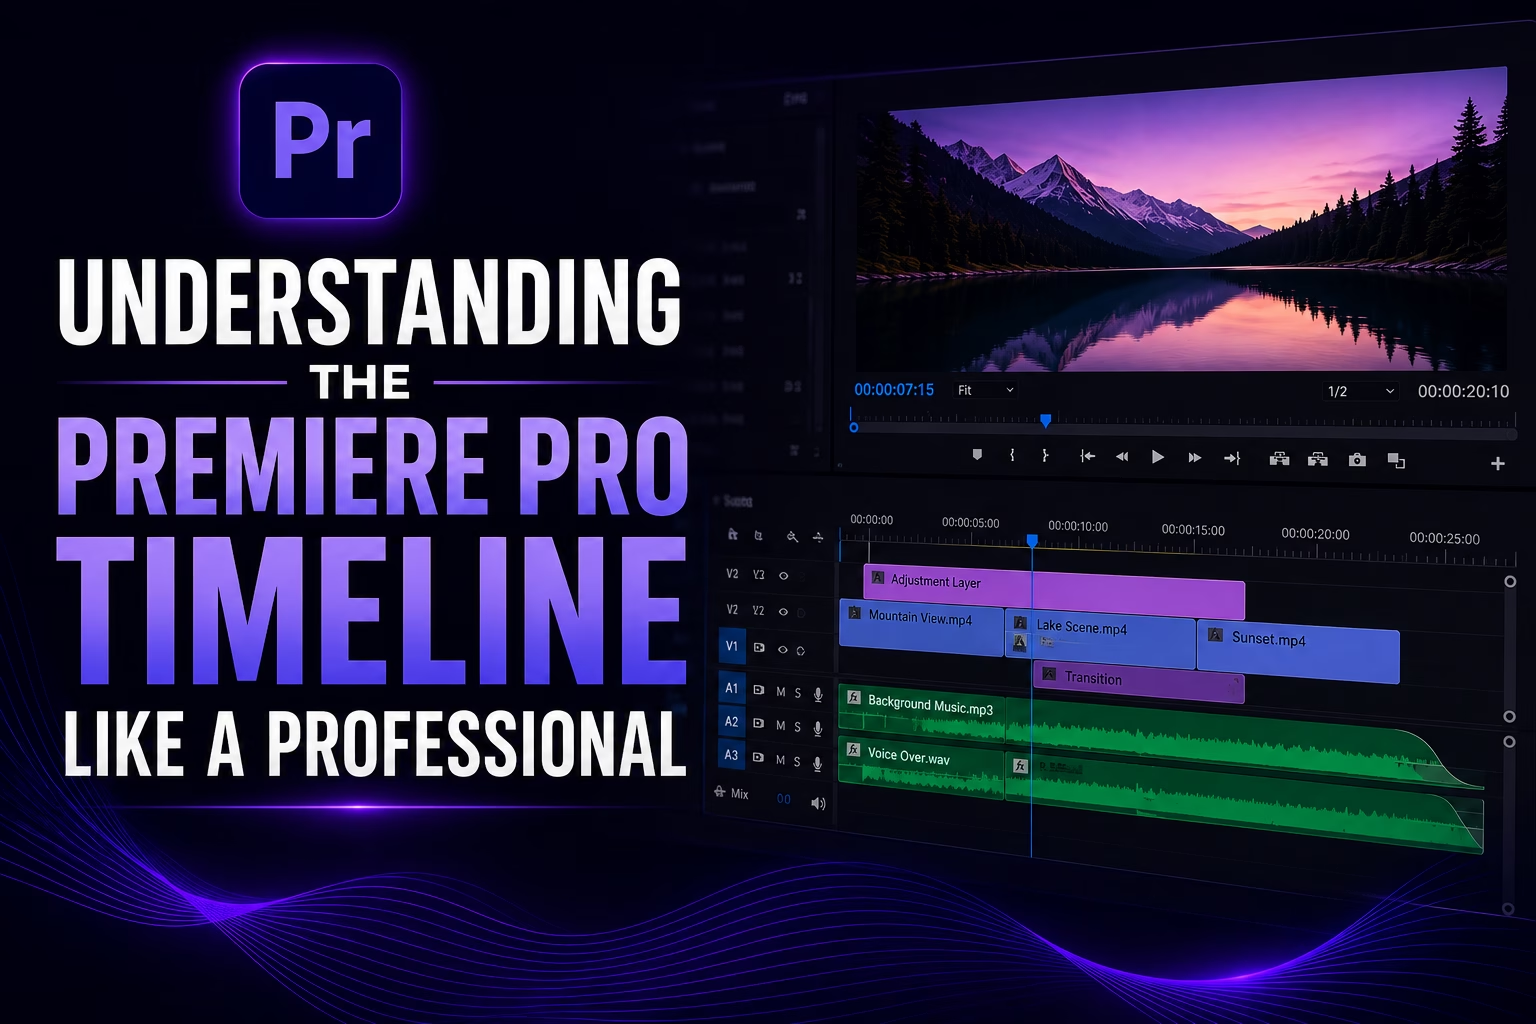
Adobe Premiere Pro’s Timeline is where video editing actually happens. You can import hundreds of clips, organize your media perfectly, and have the right effects installed, but if you do not understand how the Timeline works, editing will remain slow, messy, and frustrating.
A professional editor does not simply drag clips onto the Timeline and start cutting randomly. They understand tracks, sequences, playheads, editing tools, clip relationships, markers, transitions, keyframes, audio organization, and the shortcuts that make the entire process faster.
The Timeline is essentially the control center of your Premiere Pro project. It determines how your video, audio, graphics, effects, transitions, and other elements are arranged over time.
This guide explains how the Premiere Pro Timeline works and how to use it efficiently like a professional editor.
What Is the Premiere Pro Timeline?
The Timeline panel in Adobe Premiere Pro is the workspace where you assemble and edit your video and audio clips.
Every element in your sequence is positioned along two dimensions:
- Horizontal position: Determines when the clip appears.
- Vertical position: Determines which video or audio track the clip occupies.
For example, a video clip placed at the beginning of V1 will appear at the beginning of your sequence. If another clip is placed later on V2, it can appear above the V1 content.
The Timeline also allows you to:
- Cut and trim clips
- Rearrange footage
- Add transitions
- Synchronize audio and video
- Create multiple video and audio layers
- Add titles and graphics
- Animate effects
- Adjust audio
- Add markers
- Control clip timing
- Create complex compositions
Understanding these basic principles is essential before moving into advanced editing techniques.
Understanding a Premiere Pro Sequence
Before working with the Timeline, it is important to understand what a sequence is.
A sequence is the environment in which you assemble your final video. It contains the Timeline settings, video tracks, audio tracks, frame rate, resolution, and other editing parameters.
You can have multiple sequences inside the same Premiere Pro project.
For example, one project might contain:
- Main YouTube Video
- Instagram Reel
- YouTube Short
- Intro Animation
- Product Advertisement
- Final Export
Each sequence can have different dimensions and settings.
How to Create a Sequence
You can create a sequence by going to:
File > New > Sequence
You can also drag a video clip onto the New Item icon in the Project panel. Premiere Pro can automatically create a sequence based on that clip’s properties.
However, professionals should not blindly rely on automatic sequence creation.
Before starting a major project, check:
- Resolution
- Frame rate
- Audio sample rate
- Timebase
- Aspect ratio
- Preview settings
For example, a standard YouTube video might use a 1920 × 1080 sequence, while vertical social media content commonly uses a 1080 × 1920 sequence.
The Basic Layout of the Timeline
The Premiere Pro Timeline contains several important areas.
1. Timeline Ruler
The ruler runs horizontally across the top of the Timeline.
It represents time within your sequence.
Depending on the zoom level, you may see:
- Frames
- Seconds
- Minutes
- Hours
You can click on the ruler to move the playhead to a particular point.
2. Playhead
The playhead is one of the most important elements in Premiere Pro.
It shows your current position in the sequence.
When you press Play, the playhead moves across the Timeline.
You can:
- Drag the playhead manually
- Use keyboard shortcuts
- Jump between edit points
- Move it to markers
- Use it to determine where edits occur
Professional editors constantly use the playhead to navigate their sequences.
3. Tracks
Tracks are the horizontal layers where your media is placed.
Premiere Pro separates video and audio tracks.
Video tracks are labeled:
- V1
- V2
- V3
- V4
- And so on
Audio tracks are labeled:
- A1
- A2
- A3
- A4
- And so on
You can create additional tracks whenever necessary.
Understanding Video Tracks
Video tracks determine the visual stacking order of your clips.
Generally, a clip on a higher video track appears above clips on lower tracks.
For example:
- V1 = Main video
- V2 = B-roll
- V3 = Text
- V4 = Graphics
If a graphic is placed on V3, it can appear over the video playing on V1.
This makes video tracks extremely useful for layering content.
Example
Imagine you are creating a tutorial video.
Your Timeline might look like this:
V3: Logo
V2: Screen recording
V1: Camera footage
The logo can remain visible above the other content while the camera footage and screen recording are arranged underneath it.
Understanding Audio Tracks
Audio tracks work similarly but are used for sound.
You might organize your audio like this:
A1: Dialogue
A2: Voice-over
A3: Music
A4: Sound effects
A5: Ambient sound
This organization makes audio editing significantly easier.
Instead of having every sound randomly placed across multiple tracks, you know exactly where each type of audio belongs.
Why Professional Editors Organize Tracks
One of the biggest differences between beginners and professional editors is Timeline organization.
A beginner might place everything wherever there is empty space.
A professional usually establishes a consistent structure.
For example:
Video
- V1 – Main footage
- V2 – B-roll
- V3 – Graphics
- V4 – Titles
- V5 – Adjustment layers
Audio
- A1 – Dialogue
- A2 – Voice-over
- A3 – Music
- A4 – Sound effects
- A5 – Ambient audio
The exact organization is not mandatory, but consistency is.
When a project becomes several hours long, good organization saves enormous amounts of time.
Track Targeting
Track targeting determines which tracks are affected by certain editing operations.
You may see buttons labeled:
V1, V2, V3…
and:
A1, A2, A3…
These controls can be activated or deactivated.
Understanding track targeting becomes particularly important when using:
- Copy and paste
- Insert edits
- Overwrite edits
- Keyboard shortcuts
- Source patching
- Three-point editing
If Premiere Pro appears to place a clip on the wrong track, track targeting is one of the first things you should check.
Source Patching vs Track Targeting
These two concepts are frequently confused.
Source Patching
Source patching determines where media from the Source Monitor is placed when you perform certain edits.
For example, you may have:
- Video source patching enabled for V1
- Audio source patching enabled for A1
This tells Premiere Pro where source media should be inserted.
Track Targeting
Track targeting determines which existing Timeline tracks are targeted for certain operations.
Understanding this distinction becomes increasingly important as your projects become more complex.
Locking Tracks
You can lock individual tracks using the lock icon.
A locked track cannot normally be edited.
This is useful when you have finished a section and do not want to accidentally modify it.
For example, after completing your dialogue edit, you might lock the dialogue track while working on music and sound effects.
Track locking is especially useful in large projects.
Hiding and Showing Video Tracks
Video tracks can be disabled using the track output control.
This allows you to temporarily hide content without deleting it.
For example, you might have:
- Original footage
- Color-corrected footage
- Alternative graphics
- Different versions of a title
You can turn tracks on and off to compare different versions.
Solo and Mute Controls for Audio
Audio tracks have controls that help you isolate specific sounds.
Mute
Mute disables a particular audio track.
This is useful when you want to temporarily remove:
- Music
- Dialogue
- Sound effects
- Background noise
Solo
Solo allows you to listen to a particular track or group of tracks while ignoring others.
For example, if you are mixing dialogue, soloing the dialogue track lets you concentrate on voice quality without music or sound effects distracting you.
Zooming the Timeline
Timeline zoom is one of the most important skills for efficient editing.
You need to be able to quickly switch between:
- A broad overview of your entire sequence
- A detailed view of individual frames
When making large structural edits, zoom out.
When performing precise cuts, zoom in.
Useful Shortcuts
Some commonly used Premiere Pro Timeline shortcuts include:
+ – Zoom in
– – Zoom out
** – Fit sequence in Timeline
The exact keyboard behavior can depend on your keyboard layout and Premiere Pro configuration, so it is worth checking your current shortcut settings.
The Difference Between Selection and Editing Tools
Premiere Pro includes several tools designed for different editing operations.
The most important ones include:
Selection Tool
Shortcut:
V
The Selection Tool is used to:
- Select clips
- Move clips
- Select transitions
- Adjust certain properties
It is the default tool for general editing.
Razor Tool
Shortcut:
C
The Razor Tool cuts clips at the playhead position.
For example, if a clip is 30 seconds long and you cut it at 15 seconds, Premiere Pro creates two separate clip segments.
However, professional editors do not necessarily use the Razor Tool for every cut.
Keyboard shortcuts such as Ctrl/Cmd + K can often be faster.
Ripple Edit Tool
Shortcut:
B
Ripple editing allows you to trim a clip while automatically closing the resulting gap.
This is extremely useful for fast editing.
Rolling Edit Tool
Shortcut:
N
Rolling edits adjust the boundary between two adjacent clips without changing the overall sequence duration.
This is useful when you want to decide exactly how much of each clip is visible.
Rate Stretch Tool
Shortcut:
R
The Rate Stretch Tool changes a clip’s duration by adjusting its playback speed.
It can be useful when you need a clip to fit a specific amount of time.
Three-Point Editing
Three-point editing is one of the techniques that separates efficient editors from beginners.
Instead of manually dragging clips around the Timeline, you define:
- An In point
- An Out point
- A destination point
Premiere Pro then places the selected portion of the source clip into the sequence.
This method allows editors to assemble sequences much faster.
In and Out Points
In and Out points define the section of a clip you want to use.
Common shortcuts:
I – Mark In
O – Mark Out
For example, imagine a 60-second interview clip.
You may only need the section between 12 and 25 seconds.
Instead of dragging the entire clip onto the Timeline and trimming it afterward, you can mark:
In: 00:12
Out: 00:25
Then insert only that section.
This is much more efficient for interviews, documentaries, tutorials, and other content-heavy projects.
Understanding Clip Edits
When clips are placed next to each other, the point where they meet is called an edit point.
For example:
Clip A | Clip B
The vertical boundary between them is the edit point.
Many professional editing decisions happen at these boundaries.
You can adjust edit points using:
- Selection Tool
- Ripple Edit Tool
- Rolling Edit Tool
- Keyboard shortcuts
Learning to manipulate edit points accurately is far more valuable than simply knowing how to cut clips.
Ripple Editing
Ripple editing is particularly important for fast workflows.
Suppose you remove a five-second section from the middle of your sequence.
With a standard deletion, you may create a five-second gap.
A ripple delete removes the unwanted material and closes the gap automatically.
This keeps the rest of your sequence moving forward.
Example
Original:
Clip A → Clip B → Clip C
Remove Clip B using ripple delete:
Clip A → Clip C
No manual repositioning is necessary.
Gaps in the Timeline
Gaps are empty spaces between clips.
They are not always a problem.
Sometimes a gap is intentional.
For example, you may want:
- A pause before a new section
- A black screen
- Room for future footage
- Timing for a voice-over
But accidental gaps are one of the most common signs of an inefficient edit.
Always inspect your Timeline before exporting.
Linked Selection
Video and audio captured together are often linked.
For example:
Video Clip + Camera Audio
When linked selection is enabled, selecting one typically selects the other.
This prevents accidental separation between picture and sound.
However, there are situations where you may need to work with audio and video independently.
You can temporarily disable linked selection when necessary.
Unlinking Audio and Video
Right-click the linked clip and select:
Unlink
This separates the audio and video components.
You might do this when:
- Replacing camera audio
- Keeping only dialogue
- Removing unwanted production sound
- Syncing external audio
- Creating alternative sound designs
Do not unlink clips unnecessarily. Keeping related media linked generally reduces accidental mistakes.
Snapping
Snapping helps clips align with other Timeline elements.
When snapping is enabled, clips can automatically align with:
- Clip edges
- Playhead
- Markers
- Other edit points
The shortcut is:
S
Snapping is extremely useful for precise editing.
Without it, you may accidentally leave tiny gaps between clips.
Markers
Markers are useful for organizing important points in your sequence.
You can place markers at:
- Important dialogue
- Music beats
- Visual changes
- Effects points
- Review notes
- Client comments
- Story beats
The default marker shortcut is:
M
Markers are particularly useful when collaborating with other editors or reviewing a long sequence.
Using Markers Professionally
Instead of placing random markers, create a consistent system.
For example:
Green: Important footage
Red: Problems to fix
Blue: Graphics
Yellow: Client notes
The exact colors do not matter.
The system does.
If you return to the project two weeks later, your markers should immediately tell you what needs attention.
Working With Adjustment Layers
Adjustment layers are extremely useful in professional editing workflows.
An adjustment layer allows you to apply effects to multiple clips without modifying each clip individually.
For example, you could place an adjustment layer above several clips and apply:
- Color grading
- Blur
- Sharpening
- Creative effects
- Vignettes
This keeps your Timeline cleaner and makes global adjustments easier.
Nested Sequences
A nested sequence is essentially a sequence placed inside another sequence.
This becomes useful when your project contains complicated sections.
For example, you might have:
Main Video
Inside it:
Intro Sequence
Inside the intro:
- Logo animation
- Text
- Music
- Sound effects
- Multiple video layers
Instead of keeping every element visible in the main Timeline, you can nest the intro.
This reduces Timeline clutter.
When Should You Nest?
Use nesting when:
- A section contains many layers
- You need to reuse a complex sequence
- You want to apply an effect to an entire section
- You want to simplify the main Timeline
Do not nest everything.
Overusing nested sequences can make projects harder to troubleshoot.
Understanding Keyframes in the Timeline
Keyframes allow properties to change over time.
For example, you can animate:
- Position
- Scale
- Rotation
- Opacity
- Volume
- Effects
A property might begin at one value and gradually move to another.
For example:
Opacity:
0% → 100%
This creates a fade-in effect.
Keyframes can be displayed directly within the Timeline when the appropriate track or property view is enabled.
Audio Keyframes
Audio keyframes allow you to control volume over time.
For example:
Music starts at:
-6 dB
Then gradually decreases to:
-25 dB
while dialogue begins.
This technique is called ducking.
Premiere Pro can also automate dialogue ducking using the Essential Sound workflow.
Audio Track Organization
Professional audio organization can dramatically improve editing speed.
A practical structure might look like:
A1-A2: Dialogue
A3: Voice-over
A4-A5: Music
A6-A8: Sound effects
A9: Ambient sound
You can then apply track-level effects and adjustments more efficiently.
Using Color Labels
Premiere Pro allows you to assign colors to clips.
You can use these colors to identify categories.
For example:
- Interviews
- B-roll
- Graphics
- Music
- Effects
- Stock footage
Again, the exact colors are less important than consistency.
Color coding becomes particularly valuable in large projects.
Managing Long Timelines
Large projects can become difficult to navigate.
Instead of trying to keep everything visible simultaneously, use organizational techniques such as:
- Nested sequences
- Track organization
- Markers
- Color labels
- Consistent naming
- Proper bins
- Sequence duplication
- Regular cleanup
A 60-minute documentary may contain hundreds of clips.
Without organization, editing becomes unnecessarily difficult.
The Importance of Track Height
You can adjust the height of Timeline tracks.
Increase track height when you need to:
- See audio waveforms
- Adjust keyframes
- Examine clip information
- Make precise edits
Reduce track height when you need:
- A broader Timeline overview
- More tracks visible simultaneously
- Less visual clutter
Professional editors constantly adjust the Timeline interface depending on the task.
Audio Waveforms
Audio waveforms provide a visual representation of sound.
They can help you identify:
- Speech
- Pauses
- Loud sounds
- Silence
- Music beats
- Noisy sections
However, do not rely entirely on waveforms.
A waveform tells you about the shape and level of the audio, not necessarily whether the sound is good.
Always listen critically.
Using Timecode
Timecode provides an exact reference for your position in the sequence.
A typical timecode display looks like:
00:01:24:15
This represents:
- Hours
- Minutes
- Seconds
- Frames
Timecode becomes particularly important for:
- Broadcast work
- Professional collaboration
- Client feedback
- Synchronization
- Precise editing
If a client tells you:
“Change the shot at 00:02:17:12”
you can immediately locate the relevant section.
Keyboard Shortcuts That Speed Up Timeline Editing
Professional editors rely heavily on keyboard shortcuts.
Some important shortcuts include:
| Shortcut | Function |
|---|---|
| V | Selection Tool |
| C | Razor Tool |
| B | Ripple Edit Tool |
| N | Rolling Edit Tool |
| R | Rate Stretch Tool |
| I | Mark In |
| O | Mark Out |
| M | Add Marker |
| S | Toggle Snapping |
| Ctrl/Cmd + K | Add Edit |
| Ctrl/Cmd + Z | Undo |
| Ctrl/Cmd + C | Copy |
| Ctrl/Cmd + V | Paste |
| Delete | Delete selected item |
| Shift + Delete | Ripple Delete |
| + | Zoom in |
| – | Zoom out |
| \ | Fit Timeline to view |
Shortcut availability can vary slightly depending on your Premiere Pro version, keyboard layout, and custom shortcut configuration.
Why Keyboard Editing Is Faster
Consider two workflows.
Beginner Workflow
- Move the mouse
- Select Razor Tool
- Click the clip
- Return to Selection Tool
- Select unwanted section
- Delete it
- Close the gap
Efficient Workflow
- Move playhead
- Press Ctrl/Cmd + K
- Select unwanted section
- Ripple delete
The second workflow eliminates unnecessary mouse movement.
Multiply that difference by hundreds of edits and the time savings become substantial.
Editing With J, K, and L
The J, K, and L keys are extremely useful for reviewing footage.
L plays forward.
J plays backward.
K pauses playback.
Repeatedly pressing J or L can increase playback speed.
This allows editors to review footage without constantly using the mouse.
It is one of the simplest ways to improve editing speed.
Professional Timeline Workflow
A strong Timeline workflow usually follows a logical progression.
Step 1: Create the Sequence
Set the correct:
- Resolution
- Frame rate
- Aspect ratio
- Audio settings
Step 2: Organize Your Media
Create logical bins for:
- Footage
- Audio
- Music
- Graphics
- Images
- Exports
Step 3: Build the Rough Cut
Focus on storytelling.
Do not spend time perfecting transitions or color grading yet.
Step 4: Refine the Edit
Improve:
- Timing
- Pacing
- Continuity
- Shot selection
- Dialogue
Step 5: Add B-Roll
Use supporting footage to cover cuts and improve visual storytelling.
Step 6: Add Graphics
Add:
- Titles
- Lower thirds
- Logos
- Captions
- Callouts
Step 7: Edit Audio
Balance:
- Dialogue
- Music
- Sound effects
- Ambient sound
Step 8: Color Correct
Correct exposure, white balance, contrast, and other technical problems.
Step 9: Color Grade
Apply the desired creative look.
Step 10: Review Everything
Watch the entire sequence.
Look for:
- Jump cuts
- Black frames
- Unwanted gaps
- Audio pops
- Incorrect graphics
- Spelling errors
- Sudden volume changes
- Missing footage
Step 11: Export
Only export after the Timeline has been thoroughly reviewed.
Common Premiere Pro Timeline Mistakes
Mistake 1: Putting Everything on One Track
This creates unnecessary confusion.
Use multiple tracks when layering content.
Mistake 2: Random Track Organization
If clips are placed randomly across tracks, finding specific elements becomes difficult.
Create a consistent structure.
Mistake 3: Overusing Effects
Effects cannot fix bad storytelling.
A professionally edited sequence is usually built around strong footage, pacing, and sound—not excessive transitions.
Mistake 4: Ignoring Audio
Many beginners focus almost entirely on visuals.
Bad audio can make an otherwise good video feel amateur.
Mistake 5: Editing Everything at Maximum Zoom
You need both detailed and overview perspectives.
Zoom in for precision and zoom out for structure.
Mistake 6: Using the Mouse for Everything
This is one of the biggest productivity killers.
Learn keyboard shortcuts.
Mistake 7: Never Locking Completed Tracks
If you accidentally move or delete finished material, you may waste time reconstructing it.
Lock finished tracks when appropriate.
Mistake 8: Overusing Nested Sequences
Nesting is powerful, but excessive nesting can make troubleshooting difficult.
Use it strategically.
How Professionals Think About the Timeline
The most important lesson is that professional editing is not about knowing every Premiere Pro button.
It is about making intentional decisions.
A professional editor constantly asks:
- Does this shot improve the story?
- Is this cut too early?
- Is this cut too late?
- Is the pacing appropriate?
- Does the audio support the image?
- Is this transition necessary?
- Is the viewer’s attention being directed properly?
- Is the Timeline organized enough to make future changes easy?
The software is only the tool.
Editing judgment is the real skill.
A Practical Timeline Structure for YouTube Videos
For a typical YouTube production, you could organize your Timeline like this:
V1: Main camera footage
V2: B-roll
V3: Screen recordings
V4: Titles and captions
V5: Graphics
V6: Adjustment layers
A1: Main dialogue
A2: Voice-over
A3: Music
A4: Sound effects
A5: Ambient sound
This is not the only correct structure, but it provides a clear starting point.
A Practical Timeline Structure for Social Media Videos
Vertical videos often require more layered visual elements.
A possible structure is:
V1: Main footage
V2: B-roll
V3: Captions
V4: Animated text
V5: Logos and graphics
V6: Adjustment layers
Audio:
A1: Dialogue
A2: Music
A3: Sound effects
This makes it easier to manage fast-paced social media content.
How to Keep Your Timeline Clean
A clean Timeline is easier to edit.
Follow these principles:
Keep Related Content Together
Put dialogue together.
Put music together.
Put sound effects together.
Avoid Unnecessary Empty Tracks
You do not need dozens of unused tracks.
Rename Important Sequences
Instead of:
Sequence 01
use:
YouTube_Main_Edit_v03
Duplicate Before Major Changes
Before making a significant structural change, duplicate the sequence.
For example:
Main_Edit_v03
becomes:
Main_Edit_v04
This gives you a fallback version.
Professional Timeline Habits
Developing good habits is more important than memorizing hundreds of features.
Habit 1: Save Frequently
Use:
Ctrl/Cmd + S
You can also configure Premiere Pro’s Auto Save settings.
Habit 2: Keep Versions
Do not overwrite every version of your project.
Versioning gives you a safety net.
Habit 3: Organize Before the Project Gets Large
Do not wait until the Timeline becomes a disaster.
Habit 4: Use Shortcuts
Every repetitive mouse action is an opportunity to improve your workflow.
Habit 5: Review at Multiple Speeds
Watch normally.
Then review sections slowly when necessary.
Habit 6: Listen With Headphones
Audio problems are often easier to identify with headphones.
Timeline Performance Tips
Large projects can become demanding on your computer.
To improve Timeline performance, consider:
- Using proxies for high-resolution footage
- Lowering playback resolution
- Closing unnecessary applications
- Keeping media organized
- Using optimized codecs when appropriate
- Rendering difficult sections
- Avoiding unnecessary effects during early editing
Proxy workflows are particularly useful when working with demanding 4K, 6K, or 8K footage.
Timeline vs Source Monitor
The Source Monitor and Timeline serve different purposes.
Source Monitor
Used to inspect and prepare source footage.
You can:
- Preview clips
- Set In and Out points
- Review footage
- Prepare clips for editing
Timeline
Used to assemble the final sequence.
You can:
- Arrange clips
- Trim edits
- Add effects
- Mix audio
- Build the final story
Understanding this distinction makes the editing process much more efficient.
Timeline vs Program Monitor
The Program Monitor shows what your sequence currently looks like.
The Timeline controls the arrangement of the content.
Think of it this way:
Timeline = How the video is constructed
Program Monitor = What the constructed video looks like
You need both to edit effectively.
How to Become Faster in Premiere Pro
If you want to edit like a professional, do not try to memorize every feature at once.
Start with the fundamentals:
- Learn Timeline navigation.
- Learn J, K, and L playback.
- Learn In and Out points.
- Learn Add Edit.
- Learn Ripple Delete.
- Learn Ripple and Rolling edits.
- Learn track targeting.
- Learn snapping.
- Learn markers.
- Learn keyboard customization.
- Learn nesting.
- Learn audio organization.
- Learn adjustment layers.
- Learn proxy workflows.
Once these become automatic, your editing speed will improve dramatically.
Final Thoughts
The Premiere Pro Timeline is much more than a place where you drag video clips.
It is the foundation of your entire editing workflow.
Understanding tracks, edit points, trimming, snapping, markers, keyframes, audio organization, nesting, and keyboard shortcuts allows you to work faster and with greater precision.
But there is an important distinction: knowing Premiere Pro is not the same as knowing how to edit.
Software skills make you faster.
Editing judgment makes your videos better.
The goal should therefore not be to fill your Timeline with effects, transitions, and complicated layers. The goal is to create a Timeline that is organized, intentional, efficient, and easy to change.
When your Timeline becomes an organized representation of your creative decisions rather than a pile of clips, you are beginning to work like a professional editor.
Frequently Asked Questions
What is the Timeline in Premiere Pro?
The Timeline is the primary editing workspace where you arrange video, audio, graphics, effects, transitions, and other media in chronological order.
How do I add a clip to the Premiere Pro Timeline?
You can drag a clip from the Project panel into the Timeline or use Source Monitor editing commands such as Insert and Overwrite.
What is V1 in Premiere Pro?
V1 is the first video track in a sequence. Additional video tracks such as V2, V3, and V4 can be used to layer visual elements.
What is A1 in Premiere Pro?
A1 is the first audio track. Additional audio tracks can be used for dialogue, music, sound effects, ambience, and other audio elements.
What does the playhead do?
The playhead indicates the current position in your sequence and determines where playback, editing commands, and many Timeline operations occur.
What is ripple editing?
Ripple editing changes the duration of a clip while automatically adjusting surrounding content to prevent an unwanted gap.
Why should I use multiple Timeline tracks?
Multiple tracks allow you to organize and layer different types of visual and audio content efficiently.
What is nesting in Premiere Pro?
Nesting places one sequence inside another sequence. It is useful for managing complex sections of a project and reducing Timeline clutter.
What is the best way to organize a Premiere Pro Timeline?
There is no single universal layout, but a consistent track structure, meaningful sequence names, color labels, markers, and logical separation of dialogue, music, effects, graphics, and footage will make projects much easier to manage.
Can I customize Premiere Pro keyboard shortcuts?
Yes. Premiere Pro allows you to customize keyboard shortcuts so you can build a workflow around the editing operations you use most frequently.
Key Takeaway
A professional Premiere Pro Timeline should be:
Organized + Precise + Efficient + Flexible
Master those four qualities, and Premiere Pro becomes significantly easier to control.