




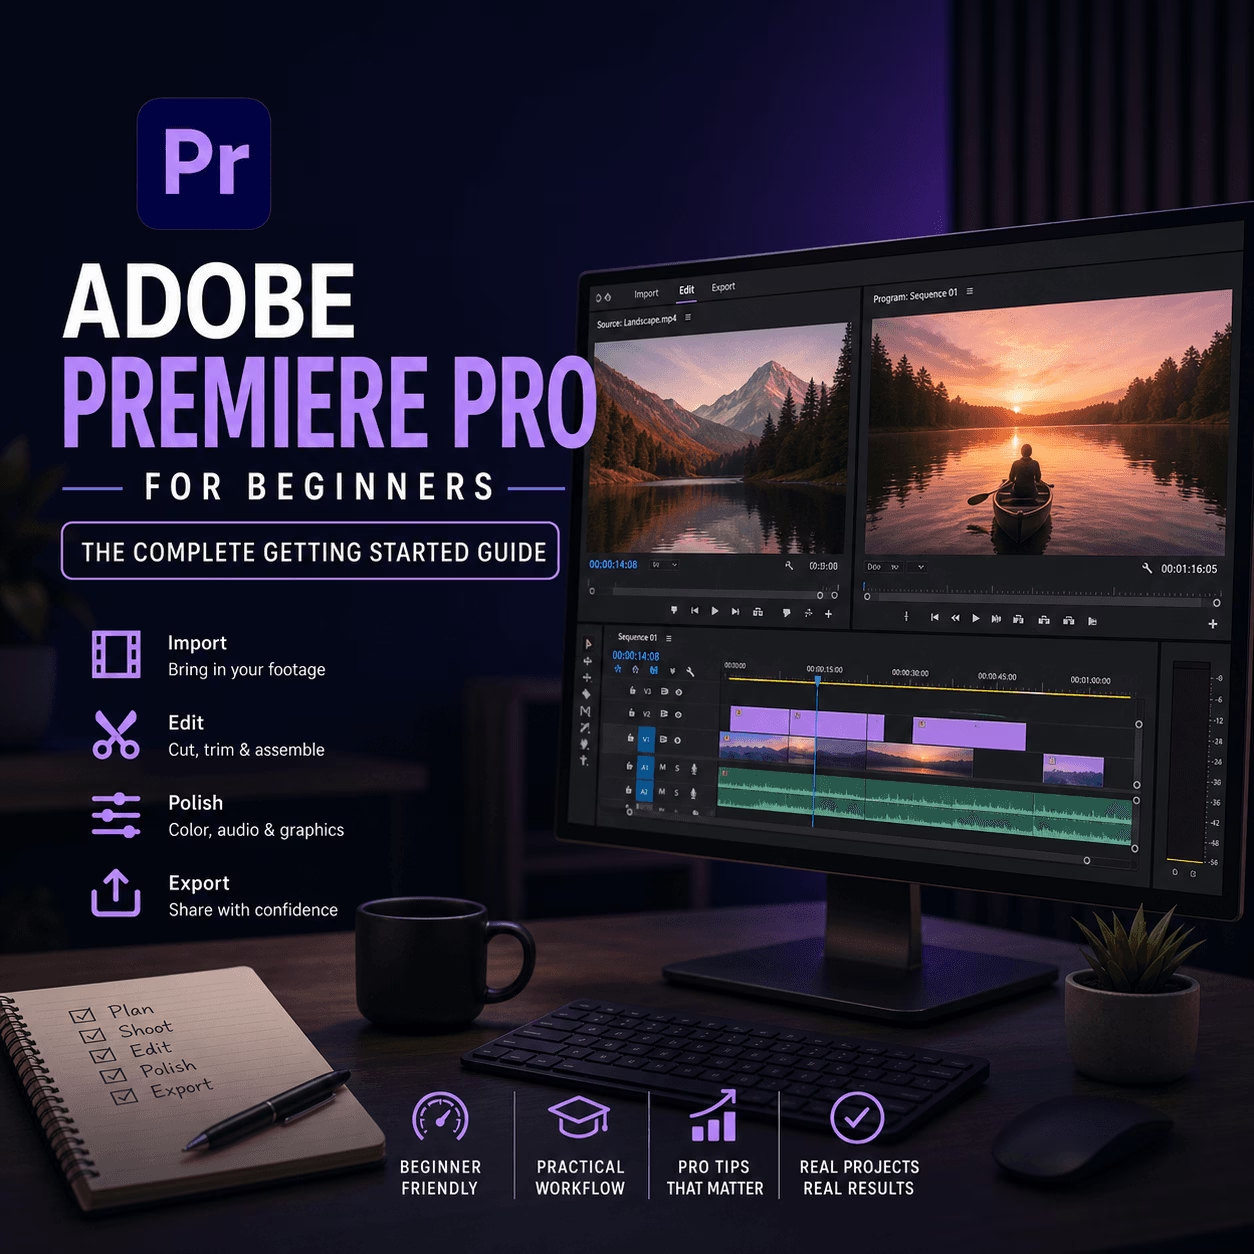
Premiere Pro can feel like a cockpit the first time you open it. Buttons everywhere. Panels you did not ask for. And that one moment where you drag in a clip and suddenly nothing plays and you assume your laptop is broken.
It’s not broken. You’re just new. And that’s fine.
This guide is built to get you editing confidently without trying to turn you into a full time post production wizard in one weekend. You only need the basics that actually move a project forward.
What Adobe Premiere Pro Is (And What It’s Not)
Adobe Premiere Pro is a professional NLE, meaning non linear editor. Non linear just means you can edit in any order. You can chop up clips, move things around, try ideas, undo them, try again. It’s the standard tool for a lot of real work.
People use Premiere Pro for:
- YouTube videos
- Short films
- Marketing videos
- Client work
- Podcasts with video
- Reels, Shorts, TikToks (yes, really)
What it’s great for, specifically:
- Editing and trimming fast
- Organizing footage and building a story
- Color correction and basic grading (Lumetri)
- Audio cleanup and simple mixing (Essential Sound)
- Captions and subtitles
- Basic motion graphics using templates (MOGRTs)
- Collaboration with other Adobe apps and team workflows
What it’s not:
- It’s not a simple phone editor. It can be simple once you know it, but it is not designed to hold your hand.
- It’s not a dedicated VFX tool. That’s After Effects. Premiere can do light compositing and effects, but if you’re trying to do complex motion graphics, tracking, heavy animation, you’ll hit a wall.
- It’s not a full digital audio workstation. That’s Adobe Audition. Premiere can absolutely handle “good enough” audio for most YouTube and marketing work, but it’s not where you master music production.
Beginner expectation setting, the honest version: you do not need to learn everything. Learn the 20% that gets you importing, cutting, cleaning audio, basic color, captions, exporting. That alone makes you dangerous in a good way.
Before You Start: Hardware, Storage, and Project Setup That Prevents Headaches
A lot of Premiere “problems” are not Premiere problems. They are storage problems. Or laptop problems. Or “I edited off an SD card and now everything is offline” problems.
Here’s a beginner checklist.
Hardware basics (no stress, just the important bits)
- RAM: 16GB is the practical minimum. 32GB feels calm. 8GB is pain.
- CPU: More cores helps. Modern Intel i5/i7 or Apple Silicon or Ryzen 5/7 is usually fine.
- GPU: Helpful for playback and export, especially with effects and color. Not mandatory for basic cuts, but you will feel it.
- SSD: This is the biggest quality of life upgrade. Footage on SSD plays smoother, caching is faster, everything feels less stuck.
Storage planning (this matters more than you think)
Premiere touches multiple types of files: the project file itself, your media (video, audio, images), cache files it builds for speed, preview renders, and exports.
If you dump everything into one random folder on your desktop, it can work. Until it doesn’t. Cache grows. Exports get mixed with raw footage. Then you move stuff and links break.
A simple starter folder structure
- Project Name/ — the root folder for everything
- Premiere Project/ — your .prproj file lives here
- Footage/ — all video files
- Audio/ — music, sound effects, voiceover
- Graphics/ — titles, logos, overlays
- Exports/ — finished output files
- Cache/ — optional, but keeps things tidy
Naming convention tip: keep it boring and consistent. Client_Project_2026-07-01_v01.prproj
Proxies, in plain English
Proxies are lighter copies of your video files that Premiere can play smoothly. You edit with the lightweight versions, then export with the full quality originals automatically.
Use proxies when:
- You are editing 4K on a slower machine
- Your footage is 10 bit, or from certain cameras that are heavy to decode
- Playback is choppy even at 1/2 resolution
- Your timeline starts stuttering once you add color or effects
Set once, thank yourself later settings
- Auto Save: Turn it on. Seriously.
- Scratch Disks: Put cache and previews somewhere predictable if you can (especially if you use an external drive setup). If you don’t want to think about it yet, defaults are okay. But understand that cache can balloon.
How Premiere Pro Works: Projects, Sequences, and the Editing Timeline (Quick Mental Model)
If you understand three words, Premiere becomes way less scary.
Project file vs media files
- The project file (.prproj) is basically a set of instructions. It remembers where your clips are, your edits, your effects, your timeline.
- Your media files are the actual videos, audio, images sitting on your drive.
If you move media around after importing, Premiere can’t find it and you get “Media Offline.” Nothing is deleted, it’s just lost the path. So keep media organized from day one.
Sequence = your canvas
A sequence is where editing happens. It has settings like:
- Resolution (1920×1080, 3840×2160, 1080×1920 for vertical)
- Frame rate (24, 30, 60)
- Audio sample rate (usually 48000 Hz for video)
One project can have multiple sequences. You might have a main edit, a vertical cut, a teaser, whatever.
When working with sequences in Premiere Pro, it’s important to remember that they serve as your canvas for editing. Each sequence has specific settings such as resolution and frame rate. If you’re also considering conforming your footage to match these sequence settings more closely while maintaining quality during the editing process, you might find this guide on conforming with Resolve helpful.
Timeline basics
- Video tracks (V1, V2, V3) stack visually
- Audio tracks (A1, A2, A3) stack for sound layers
- The playhead shows where you are
- In and Out points select ranges
Source vs Program Monitor
- Source Monitor: where you preview and trim raw clips before adding them
- Program Monitor: where you watch your actual edit, the timeline output
Beginner mental workflow to remember: import → assemble → refine
That’s it. That’s editing.
Your First Launch: The Premiere Pro Workspace Explained (Without Overwhelm)
Premiere is panel based. You’re basically arranging a desk.
Key panels you’ll use constantly:
- Project panel: where your clips and bins live
- Timeline: where you edit
- Program Monitor: watch the edit
- Tools panel: selection tool, razor, etc
- Effect Controls: where you adjust position, scale, keyframes, effects settings
- Audio Track Mixer (optional): helpful later, not required day one
Workspaces
At the top, you’ll see workspaces like:
- Editing
- Color
- Audio
- Captions
These are just saved panel layouts. If you drag panels around and everything becomes chaos, you can reset:
Window → Workspaces → Reset to Saved Layout
If you’re using Visual Studio Code and find yourself in a similar situation of layout chaos, a quick reset can also be done by following these steps.
Do that any time. No shame.
Docking and saving a custom workspace
You can drag panels to dock them. Once you find a setup you like: Window → Workspaces → Save as New Workspace
Even a basic beginner workspace can save you time.
Shortcuts worth learning immediately
- Spacebar: play/pause
- J K L: rewind, stop, fast forward (tap multiple times to go faster)
- I / O: set In and Out points
- V: Selection tool
- C: Razor tool
- + / -: zoom timeline in and out
- Cmd/Ctrl + S: save (do it constantly)
Create a New Project the Right Way (Settings Beginners Should Actually Touch)
Create a new project:
- New Project
- Name it clearly
- Choose a project location inside your main project folder
Scratch disks (what they are, briefly)
Scratch disks are where Premiere stores extra stuff like previews and cache. Safe beginner approach:
- If you have a fast SSD, keep scratch disks there.
- If you edit off an external drive, consider keeping cache on an internal SSD if possible. It often performs better.
Renderer (GPU acceleration)
In Project Settings you will see two options: Mercury Playback Engine GPU Acceleration and Software Only. If you have a supported GPU, use GPU Acceleration. It helps with playback and exports, especially with color and effects.
Ingest settings (safe defaults)
Ingest can copy files, transcode files, or create proxies. The beginner safe default is to leave ingest off, unless you know you want proxies from the start. If you do want proxies, enable ingest and choose Create Proxies. More on that later.
Auto save settings
Turn on auto save. Pick something like:
- Every 5 to 10 minutes
- Keep 20 versions
It’s boring until it saves you from a crash.
Keep project and media location consistent
The fewer random folders involved, the fewer relink nightmares later. Ideally your project file lives next to your media folders inside one master project folder.
Importing Footage: The Clean, Beginner-Proof Way
You have a few ways to import.
Import methods
- Media Browser: safest for camera cards and weird folder structures. It understands AVCHD, some DSLR structures, and won’t miss sidecar files.
- File → Import: simple and fine for most cases.
- Drag and drop into the Project panel: fast, works, but be careful not to drag from an SD card and then eject it.
If you’re importing from a camera card, use Media Browser when possible.
Codecs vs containers (simple version)
- A container is the file type like .mp4, .mov
- A codec is how the video is actually compressed inside
Two .mp4 files can behave totally differently because they are encoded differently. Some codecs are harder to play back smoothly. That’s why you might see choppy playback even on a good machine. You can refer to this forum discussion for more insights on suggested codecs and file formats that could help reduce lagging during editing.
Bins (folders) that keep you sane
Create bins like:
- Footage (A roll)
- Footage (B roll)
- Music
- SFX
- Graphics
- Sequences
Keep it simple. The goal is finding things fast.
Also, if you’re using Avid software, consider reviewing this community forum thread for additional tips on managing your project files effectively.
Frame rate mismatches and “Interpret Footage”
Sometimes your phone footage is variable frame rate. Or you shot 60fps but want it to play like normal 30fps. “Interpret Footage” can help, but beginners only need to know this:
If motion looks weird or speed is wrong, check the clip properties and frame rate. If you need to force a clip to a specific frame rate: Right click clip → Modify → Interpret Footage
Don’t overuse it. Just know it exists.
Trim in Source Monitor first
A great beginner habit: double click a clip to open it in the Source Monitor, set In and Out points, then insert it into the timeline. It keeps your timeline cleaner and your brain calmer.
Create Your First Sequence (So Your Export Doesn’t Look Wrong)
The easiest method is also the best for beginners:
Drag your “main clip” onto the New Item icon in the Project panel.
Premiere will create a sequence that matches that clip’s settings. That avoids common issues like:
- footage looks zoomed in
- export has black bars
- motion stutters
- scaling looks soft
Settings that actually matter
- Resolution (1080p vs 4K vs vertical)
- Frame rate (24/30/60)
- Aspect ratio (usually square pixels)
- Audio sample rate (usually 48000 Hz)
Common scenarios
1080p vs 4K
- Edit in 1080p if your machine struggles, even if footage is 4K. You can still export 4K later if needed, but keep it simple at first.
24 vs 30 vs 60 fps
- 24fps feels more cinematic.
- 30fps is common for YouTube talking head and general content.
- 60fps is smooth, often used for gaming or sports. Also good if you want slow motion.
Vertical 9:16 For Shorts, Reels, TikTok, you want 1080×1920. Do not just slap horizontal footage in and hope. Use a vertical sequence and reframe.
Quick note: turn on guides or safe margins if you’re doing vertical content so text stays away from UI areas.
The First Edit: Cut, Trim, and Assemble Like a Real Editor
If you do nothing else in Premiere, learn this simple order:
- Lay down A roll (your main talking or story)
- Remove mistakes and dead space
- Insert B roll (supporting visuals)
- Add music
- Tighten pacing
That is most of YouTube editing.
Selection Tool (V) and Razor Tool (C)
- V lets you click, drag, move clips, trim edges
- C cuts clips wherever you click
Practical use case:
- Razor to cut out a mistake
- Select and delete the chunk
- Close the gap with ripple delete (more on that next)
Ripple vs roll edits (beginner translation)
- Ripple changes the timing of everything after it. If you remove time, everything shifts left. If you extend, everything shifts right.
- Roll changes the cut point between two clips without changing the overall timeline length.
Beginners mostly live on ripple edits. That’s how you tighten pacing.
In/Out points and Insert/Overwrite
Instead of dragging everything onto the timeline, you can:
- Mark In and Out in Source Monitor
- Use Insert (comma key) to push content in and move later clips
- Use Overwrite (period key) to replace content at the playhead
This feels “more professional” because it is. Cleaner builds, less dragging.
Snapping, zooming, and not losing sync
- Turn Snapping on (magnet icon). Clips snap to cuts and playhead.
- Zoom timeline with + and – so you can trim precisely.
- Be careful when moving audio away from video. If they’re linked, move together. If you unlink by accident, sync problems show up later and ruin your day.
Fixing Audio Fast: Clean Dialogue, Music Levels, and Simple Mixing
Your video can be a little soft. A little shaky. People will forgive it.
Bad audio though. People leave immediately.
Goal: dialogue first, everything else supports it.
Essential Sound Basics
Open Window → Essential Sound. Select your dialogue clips and tag them as Dialogue, then apply the following adjustments:
- Apply Reduce Noise lightly
- Apply Reduce Reverb lightly — pushing it too far can sound unnatural
- Use Loudness → Auto-Match or normalization tools to even out volume differences
For music tracks, tag them as Music and lower the level so the music sits comfortably under the dialogue.
Simple Level Targets
- Avoid clipping — keep levels out of the red
- Keep dialogue consistent — no sudden jumps from whisper to shout
- Music should feel present but never compete with the voice
A simple starting point: keep dialogue peaks roughly around the middle of the meter, never slamming the top. Then adjust by ear using both headphones and speakers.
Ducking Music Under Dialogue
Ducking automatically lowers music when someone speaks. It is one of those instant-pro techniques — use it. You have two ways to do it:
- Manual keyframes: add keyframes to the music volume track and dip the level wherever speech occurs
- Essential Sound ducking: tag your dialogue and music clips, enable the ducking option, then click Generate Keyframes
Fades and Quick Fixes
- Add short fades to music at the start and end of your video
- Use the Constant Power audio transition for smooth crossfades between clips
- If you hear clicks or pops between cuts, a tiny crossfade will usually fix it
Make It Look Better: Color Correction Basics (Beginner-Friendly Lumetri)
Two words that get mixed up:
- Correction: making footage look accurate
- Grading: giving it a style
Do correction first. Always.
Lumetri basics
Go to the Color workspace, use Lumetri Color.
In Basic Correction, focus on:
- White Balance (Temp/Tint)
- Exposure
- Contrast
- Highlights and Shadows
- Whites and Blacks
- Saturation
Small moves. Don’t yank sliders like you’re trying to win a contest.
Scopes (simple explanation)
Scopes are like truth meters. Your eyes lie because your screen lies.
- Waveform shows brightness. If everything is crushed at the bottom, blacks are too deep. If everything is slammed at the top, highlights are blown out.
Beginner goal: avoid extreme clipping. Keep details in shadows and highlights when possible.
A safe workflow
- Correct one clip until it looks natural
- Apply a LUT or look lightly if you want style
- If you want the same look across many clips, use an Adjustment Layer and put it above your footage, then apply the look to that layer
Titles, Captions, and Simple Graphics (Without Going Full After Effects)
Premiere can handle a lot of basic graphics, especially for YouTube.
Essential Graphics titles
Use Window → Essential Graphics.
You can create:
- Titles
- Lower thirds
- Simple text callouts
Keep text readable:
- High contrast
- Large enough on mobile
- Safe margins so it doesn’t hug the edges
Templates (.mogrt)
MOGRTs are motion graphics templates, often made in After Effects but usable in Premiere.
You can find them:
- Built in templates
- Adobe Stock
- Third party packs
Drag a MOGRT onto the timeline, then customize text, colors, sometimes layout, inside Essential Graphics.
Captions workflow
In the Captions workspace you can:
- Create captions from scratch
- Import an SRT
- Auto transcribe and generate captions (depending on your setup and version)
Burn in vs sidecar:
- Burn in means captions are part of the video. Good for social.
- Sidecar (SRT) means captions are separate. Good for YouTube uploads and platforms that support toggling.
Typography beginner rule: two fonts max. Consistent sizes. Do not reinvent your style every scene.
Advanced motion graphics still belong in After Effects. But for most beginner needs, Premiere is enough.
Effects and Transitions Beginners Actually Need (And Which Ones to Avoid)
You do not need the whole Effects panel. You need a small, boring list that works.
Minimal set that covers most edits
- Video transitions: Cross Dissolve, Dip to Black
- Audio transitions: Constant Power
- Basic blur (for privacy, license plates, faces)
- Basic zoom punch ins (keyframed scale)
- Warp Stabilizer (carefully)
Why avoid flashy transitions: they scream template. Also they distract from the story. Most good editing is invisible.
Adjust duration and add defaults quickly
- Drag a transition onto a cut, trim its edges to change length
- Set default transitions, then select an edit point and apply default transition quickly
Keyframing, one simple example
In Effect Controls:
- Set Scale and Position keyframes at the start
- Move playhead forward
- Increase Scale slightly for a punch in
That’s it. You just did motion.
Stabilization warning
Warp Stabilizer can save a shot, but it often crops in and can create wobble artifacts. Use it when needed, not on everything.
Speed, Efficiency, and Not Crashing: Proxies, Render Previews, and Playback Settings
If Premiere feels laggy, don’t just suffer. Adjust playback like a normal person.
Signs you need proxies
- Playback stutters constantly
- Audio plays but video freezes
- You’re editing 4K, 10 bit, or long GOP footage
- Adding Lumetri or stabilization makes everything crawl
Simple proxy setup
One common method:
- Select clips in Project panel
- Right click → Proxy → Create Proxies
- Choose a preset (something like ProRes Proxy)
- Let Media Encoder generate proxies
- Toggle proxies on and off with the Toggle Proxies button (add it to the Program Monitor toolbar if you don’t see it)
When proxies are on, editing gets smoother. Export still uses full quality files.
Playback resolution
In Program Monitor, set playback to:
- 1/2 or 1/4 for smoother playback
Turn off high quality playback if needed. It’s preview, not final.
Render In/Out previews
If a section is heavy with effects:
- Set In/Out around it
- Sequence → Render In to Out
These are preview renders. They help playback. They are not the final export.
Basic troubleshooting mindset
When things get weird:
- Save, restart Premiere
- Clear cache if needed
- Update GPU drivers
- Duplicate your sequence before big experiments (seriously, make a “v2” sequence and mess there)
Export Settings That Work: YouTube, Instagram, and High-Quality MP4s
Exporting is where beginners panic because it feels like a thousand options and all of them sound important.
You need a reliable default.
Beginner default export
- Format: H.264
- Preset: Match Source, High Bitrate
- Export to your Exports folder
- Name with versioning:
ProjectName_v01.mp4
That will work for most YouTube and general use.
Bitrate in plain English
Bitrate is basically how much data you’re giving the video per second. More bitrate usually means better quality, larger file.
Safe ranges (not overly technical, just practical):
- 1080p: roughly 10 to 20 Mbps for most content
- 4K: roughly 35 to 60 Mbps depending on detail and motion
If your video is talking head with simple background, you can go lower. If it’s gameplay or lots of movement, go higher.
Hardware vs software encoding
- Hardware encoding is faster (uses GPU or dedicated chip)
- Software encoding can be slower but sometimes more reliable in tricky cases
For more information on this topic, check out this detailed comparison between hardware encoding and software encoding.
Beginner rule: use hardware encoding if it works and looks good. If exports fail or look odd, try software.
A Simple 7-Day Learning Plan to Get Comfortable (Without Burnout)
You don’t learn Premiere by watching 40 tutorials. You learn it by finishing small edits.
Here’s a simple plan.
Day 1 Workspace basics, shortcuts, import, create a sequence.
Day 2 Assemble A roll. Cut mistakes. Get used to ripple deletes and timeline speed.
Day 3 Add B roll. Practice trimming and snapping. Make it flow.
Day 4 Audio day. Essential Sound, music levels, ducking, fades.
Day 5 Basic color correction. Lumetri basics. Adjustment layer workflow.
Day 6 Titles and captions. One clean lower third. One consistent caption style.
Day 7 Export variations. Watch on your phone and laptop. Fix what feels off. Export v2.
The real goal: finish something small. Then do it again with a second video. Repetition builds confidence way faster than “studying.”
Let’s Wrap Up: Your Beginner Workflow (Import → Edit → Polish → Export)
If you want the clean beginner workflow, it’s this:
- Import (organized bins, stable folder structure)
- Edit (A roll first, then B roll, then pacing)
- Polish (audio, basic color, titles, captions)
- Export (H.264, match source, sensible bitrate, versioning)
Choppy playback is normal. Audio leveling confusion is normal. Export settings feeling like a maze is normal. None of it means you’re bad at this. It just means you’re in the part where everything is new.
Once you’re comfortable, make yourself a reusable project template. Folder structure, bins, a couple sequences, maybe a basic export preset. Future you will love you for that.
Next step, keep it simple. Open Premiere Pro and edit one short video end to end using this checklist. No perfection. Just finished. That’s how you get good.
FAQs (Frequently Asked Questions)
What is Adobe Premiere Pro and what types of projects is it best suited for?
Adobe Premiere Pro is a professional non-linear editor (NLE) that allows you to edit video footage in any order. It’s widely used for YouTube videos, short films, marketing content, client work, podcasts with video, and social media clips like Reels, Shorts, and TikToks. It excels at fast editing and trimming, organizing footage, basic color correction using Lumetri, audio cleanup with Essential Sound, adding captions, and simple motion graphics through templates.
What hardware specifications are recommended for running Adobe Premiere Pro smoothly?
For a smooth Premiere Pro experience, 16GB of RAM is the practical minimum while 32GB provides a more comfortable workflow; 8GB is likely to cause performance issues. A modern multi-core CPU such as Intel i5/i7, Apple Silicon, or Ryzen 5/7 is suitable. A GPU helps with playback and exporting especially when using effects or color grading but isn’t mandatory for basic editing. Using an SSD for storing footage significantly improves playback smoothness and caching speed.
How should I organize my files and folders for a Premiere Pro project to avoid common issues?
Organize your project with a clear folder structure under one root folder named after your project. For example: ‘Project Name/’ containing subfolders like ‘Premiere Project/’ for your .prproj file, ‘Footage/’ for video files, ‘Audio/’ for music and sound effects, ‘Graphics/’ for titles and overlays, ‘Exports/’ for final outputs, and optionally ‘Cache/’. Use consistent and boring naming conventions like ‘Client_Project_YYYY-MM-DD_v01.prproj’ to keep everything tidy and prevent broken links or offline media errors.
What are proxies in Premiere Pro and when should I use them?
Proxies are lower-resolution copies of your original video files that allow smoother playback during editing on slower machines or with high-resolution footage (like 4K or 10-bit). You edit using these lightweight versions while the software automatically switches back to full-quality originals when exporting. Use proxies if you experience choppy playback even at reduced resolution or if your timeline stutters after applying color correction or effects.
What essential settings should I configure before starting to edit in Premiere Pro?
Enable Auto Save to protect your work from unexpected crashes. Set Scratch Disks—locations where cache files and preview renders are stored—to predictable folders or drives especially if using external storage; this helps manage disk space since cache files can grow large. While defaults work initially, planning these settings early prevents headaches later.
Can you explain the difference between a Premiere Pro project file and media files?
A Premiere Pro project file (.prproj) contains instructions about your edits: which clips you’ve used, their placement on the timeline (sequence), applied effects, transitions, etc. Media files are the actual video, audio, or image files stored on your hard drive. If you move media files after importing them without updating their location in Premiere Pro, the program will show ‘Media Offline’ errors because it loses track of where those clips reside. Keeping media organized from the start avoids this issue.
Read More: How to Work with Illustrator Files in Other Adobe Applications (Photoshop, InDesign)






 and edit your first video confidently—fast.)